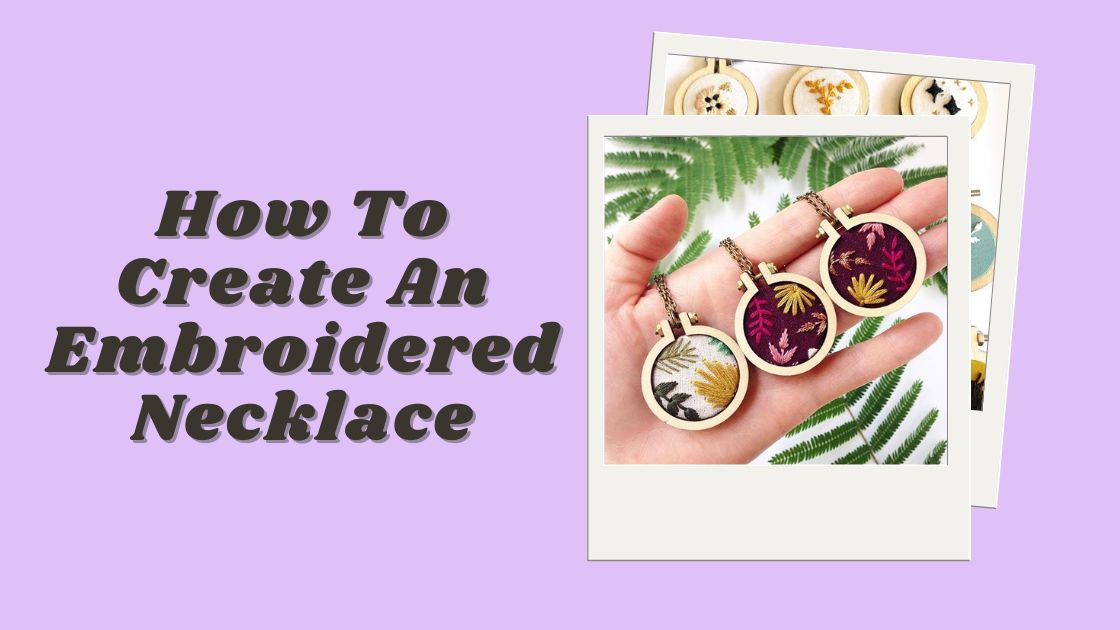
Embroidered necklaces are not just accessories; they are expressions of creativity and personal style. With a few materials and some basic embroidery skills, you can craft a unique and stunning necklace that adds a touch of elegance to any outfit. In this guide, we’ll take you through the process of creating your own embroidered necklace, from selecting materials to finishing touches.
Contents
Materials Needed:
- Embroidery hoop
- Fabric (preferably cotton or linen)
- Embroidery floss in various colors
- Embroidery needles
- Scissors
- Necklace chain or cord
- Jump ring
- Beads or sequins (optional)
- Fabric glue (optional)
Step 1: Design Your Pattern
Start by sketching out your design on paper. Keep in mind the size and shape of your necklace as you draw. Simple geometric shapes or floral patterns work well for beginners but feel free to get creative with your designs.
Step 2: Transfer the Pattern
Once you’re happy with your design, transfer it onto your fabric using a water-soluble fabric marker or tracing paper. Place the fabric in the embroidery hoop to keep it taut while you work.

Step 3: Choose Your Colors
Select embroidery floss in colors that complement your design. You can use a single color for a minimalist look or create a vibrant palette with multiple shades. Thread your embroidery needle with your chosen floss and knot the end.
Step 4: Begin Embroidering
Start stitching your design, following the lines you’ve drawn. Use basic embroidery stitches like backstitch, satin stitch, or French knots to fill in your design and add texture. Take your time and enjoy the process of bringing your design to life with each stitch.

Step 5: Add Embellishments (Optional)
For extra sparkle or dimension, consider adding beads or sequins to your embroidery. Stitch them onto your necklace using coordinating thread, or use fabric glue for a quicker application.
Step 6: Finish and Assemble
Once you’ve finished embroidering your design, carefully remove the fabric from the hoop. Trim any excess fabric around the edges, leaving a border of about half an inch. Fold the edges of the fabric under and secure them with fabric glue or a small running stitch.


Step 7: Attach the Necklace Chain
Finally, attach your embroidered piece to a necklace chain or cord of your choice. You can use jump rings to connect the fabric to the chain or sew it directly onto a fabric backing for added stability.

Some Tips & Tricks
- Choose Lightweight Fabrics: Opt for cotton or linen for easy stitching.
- Practice Stitches: Perfect your technique on scrap fabric first.
- Use Quality Materials: Invest in good embroidery floss and needles.
- Experiment with Texture: Mix different stitches for depth.
- Maintain Consistency: Keep stitches even for a polished look.
- Secure Loose Ends: Weave or knot thread ends to prevent unraveling.
- Personalize: Add initials, symbols, or quotes for a unique touch.
- Try Embellishments: Add beads or charms for extra flair.
Creating an embroidered necklace is a rewarding and enjoyable craft that allows you to showcase your individuality and style. With a bit of practice and experimentation, you can design and create beautiful necklaces that reflect your personal taste and creativity. So gather your materials, unleash your imagination, and start stitching your way to a one-of-a-kind accessory!
Related Posts